Wednesday, December 31, 2014

Tutorial: Miracle blanket wrap for baby WITHOUT the Miracle Blanket and NO SEWING

A friend of mine showed me her baby's miracle blanket while I was pregnant. She impressed me with stories of laying baby down and having him go to sleep on his own.

I planned on making my own using a pattern I found at Put Up Your Dukes while I was pregnant, but the fatigue was overpowering...

I thought I'd sew one after baby was born. You know, measure using his exact dimensions and get a perfect fit. But I never made it to the fabric store with my newborn...

The concept that makes Miracle Blanket unique is the extra flaps for securing baby's arm so he can't squirm out of the swaddle. Then when he's asleep and has a dream about kickboxing, he doesn't jerk himself awake. It really helps with teaching baby to sleep longer at night as well as keeping those cute chubby appendages inside the warm blankets.

So, I just started swaddling baby Miracle-style with blankets I already had. Ha. That didn't cost me anything.

Here's my step by step tutorial

My 3-month-old ready to be swaddled

Step 1: Get baby and two blankets

One blanket will wrap baby's arms, the other will go around all of baby to keep him warm. I put the second blanket slightly to the side so that when it wraps around, the two ends are underneath.
2 baby blankets for swaddling

Step 2: Position baby on blankets

Place baby so that second blanket lines up with tops of baby's shoulders.

Step 3: Wrap first arm

Pull blanket across arm to be swaddled and tuck it behind baby's back. Try to spread it flat so baby doesn't have to lay on a pile of wrinkles.


Here is baby with blanket tucked behind. Notice while blanket is snug enough to hold baby's arm, it is not tight. I don't want to force baby's arms behind his back or make his position uncomfortable.

Step 4: wrap second arm

Here comes blanket around second arm and behind baby's back.


Sorry for my amateur pictures; I haven't won any awards for photography. But baby could probably win an award for cuteness.

Step 5: Wrap outer blanket around baby

This one keeps his body and legs warm.


All done!

I can put baby to bed while he's still awake and if he's tired he'll fall asleep on his own. Amazing!

All wrapped up!
Now you can try swaddling your baby Miracle-blanket style and see if it works on your baby.

Friday, November 28, 2014

To my friends

After 30 years, my parents are preparing to put their home on the rental market so they can serve a mission. I feel a little nostalgic, since I lived there from the time I was four until I went to college. Of the many friends I made growing up in Utah, many no longer live there. Now they are spread across the country. Too far for visits.

I'm grateful for each of the people who have touched my life. I see my friends face their life challenges with courage and faith. It inspires me.


I just wanted to tell you that I hope you have a wonderful Christmas season.


Happy Holidays!


Thursday, November 06, 2014

Vintage Camper Remodel, Part 2: Ideas

This vintage trailer project is one of the biggest projects we've ever undertaken. Our home repairs and landscaping projects don't even compare to the time and energy this one requires! I'm glad that DH can do the grunt work because if he wasn't excited about it, this project would never get finished!

While he has to figure out tedious details like wiring, roofing, and wall panel materials, I'm brainstorming ideas for the interior of our camper. I would LOVE feedback from some of you crafty, design savvy ladies out there. (Most of my friends are more talented at decorating than I am!)

We have decided to build our trailer into a mobile bunk house. We want to comfortably sleep a big family and be able to easily stow our camping gear, kayaks, and bicycles. Room for showering is not a priority, and even cooking is easier outdoors (when its for a lot of people. There will be some seating so that if it's cold or rainy we can get inside.

Here's our list of wants:

  • Comfy beds
  • bunks that fits lots of kids
  • electric lighting (can run off battery/solar panel)
  • microwave oven 
  • air conditioner (would need generator to run)
  • seating area
  • counter area for small meal prep
  • storage custom designed to hold gear

Here's what we can go without:

  • bathroom
  • water lines (sinks)
  • propane lines (gas cooktop or oven)
  • carpet
  • recliners and seating areas for smaller numbers of people


So our working design plans for...

A queen bed in the rear, over the trunk area. I want to use the original glass sconces and have retro light fixtures over the bed. I'm also considering a curtain that pulls across the bed to divide it from the other sleeping area.

Vinyl faux wood floor.

Shelves along one wall fitted with custom cushions. The cushioned shelves function as small bunks for kids or cushions can be removed to use for gear storage.

Futon/couch that folds out into twin bed

Cabinets with storage for camping utensils, microwave oven overhead, and countertop workspace. I want to have a stow-able tin wash basin to use for washing dishes (and babies?) I have to decide what material to use for the countertop. If it's small enough I may be able to find a piece of granite. Would that be too fancy?

Folding picnic table in the front for dining seating. While traveling it could be stowed and area could be used for bicycles. Table could also be taken outside and kids could sleep on floor of area.

LED lights for interior. You can get tracks of LEDs that can do different colors. Would have dining and sleeping areas on different switches so they could be turned on/off separately.

DECOR to make trailer look cuter than typical campers. Why else do a custom redo??? I want to do an all white interior with a few accents in a pale aqua. I like clean, modern, simple decor. Not too much STUFF--the camper will already be filled with all kinds of gear (hopefully out of sight). I plan to sew pleated curtains for all the windows. I have to figure out how to install them (tracks, rods?) and what color of fabric to do. I've been saving ideas on my pinterest board.

white interior camper


Of course as we go along we'll see what actually works. What excites me about building it is the thought of a cute space that doesn't break the bank to experiment with decor.

This trailer is going to make getting out with our big family easier--just pack food and clothes and the rest is already there. We can take it on multi-day trips and on longer road trips and avoid more expensive lodging like hotels. We'll still do tent camping for trailer-inaccessible areas. Plus we still LOVE backpacking. But when you have a bunch of kids its nice to have more ways to get outside. Our trailer is cheaper than a cabin and basically the same (no running water!). We can bring it to as many different locations as we can dream of to explore.


Friday, September 19, 2014

Classic Caramel Apples - Martha Stewart Recipe


I saw Honeycrisp apples for sale and couldn't resist making them into caramel apples. This is a recipe I got off of marthastewart.com a few years back. The following year they posted a different recipe that wasn't as good.

Classic Caramel Apples

Martha Stewart

Ingredients

Makes 6.
  • 6 wooden craft sticks
  • 6 small apples, any variety, stems removed
  • 1 cup heavy cream
  • 1 cup granulated sugar
  • 1/4 cup dark corn syrup
  • 2 tablespoons unsalted butter

Directions

  1. Insert sticks into tops of apples. Prepare an ice-water bath.
  2. Bring cream, sugar, corn syrup, and butter to a boil in a saucepan over medium-high heat. Clip a candy thermometer to pan, and continue to cook until mixture reaches 245 degrees, 10 to 12 minutes.
  3. Place pan in ice-water bath to stop the cooking. Dip bottom of each apple in caramel. Using a spoon, coat apple halfway to three-quarters of the way up sides. Transfer to a parchment-lined baking sheet, and refrigerate until set, about 15 minutes (or overnight). 

My Notes: 

Took about 30 minutes to cook. Only cooked to about 240 degrees and caramel was still pretty stiff when cool. Double recipe covered 6 large honeycrisp apples. Use a large pan so mixture can bubble up without boiling over (even with constant stirring). Waxed paper is not good because the cool caramel sticks to it. Maybe try a greased cool cookie sheet or try somehow twirling the apples while the caramel cools so it doesn’t run off (would need extra hands for that).

Friday, September 05, 2014

Vintage Camper Remodel, Part 1: Demolition

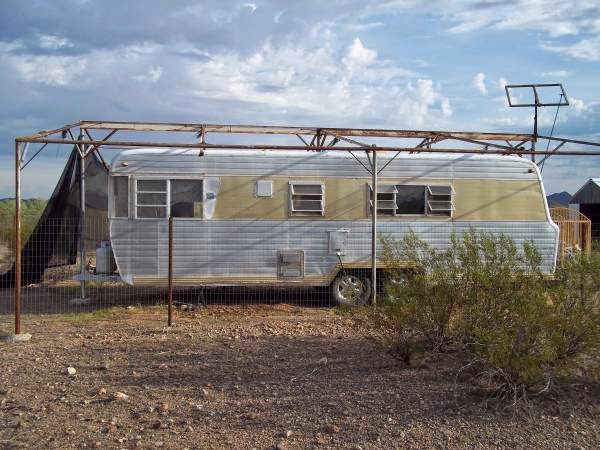
After borrowing a friend's camper and vowing I'd never bother with an RV, DH found this vintage camper for sale in the classifieds for a few hundred bucks. Its a Boles Aero aluminum camper, built airplane-style with aluminum skeleton and riveted aluminum siding. "What do you think?" He asked.


We bought it.


Ahhh, imagination...


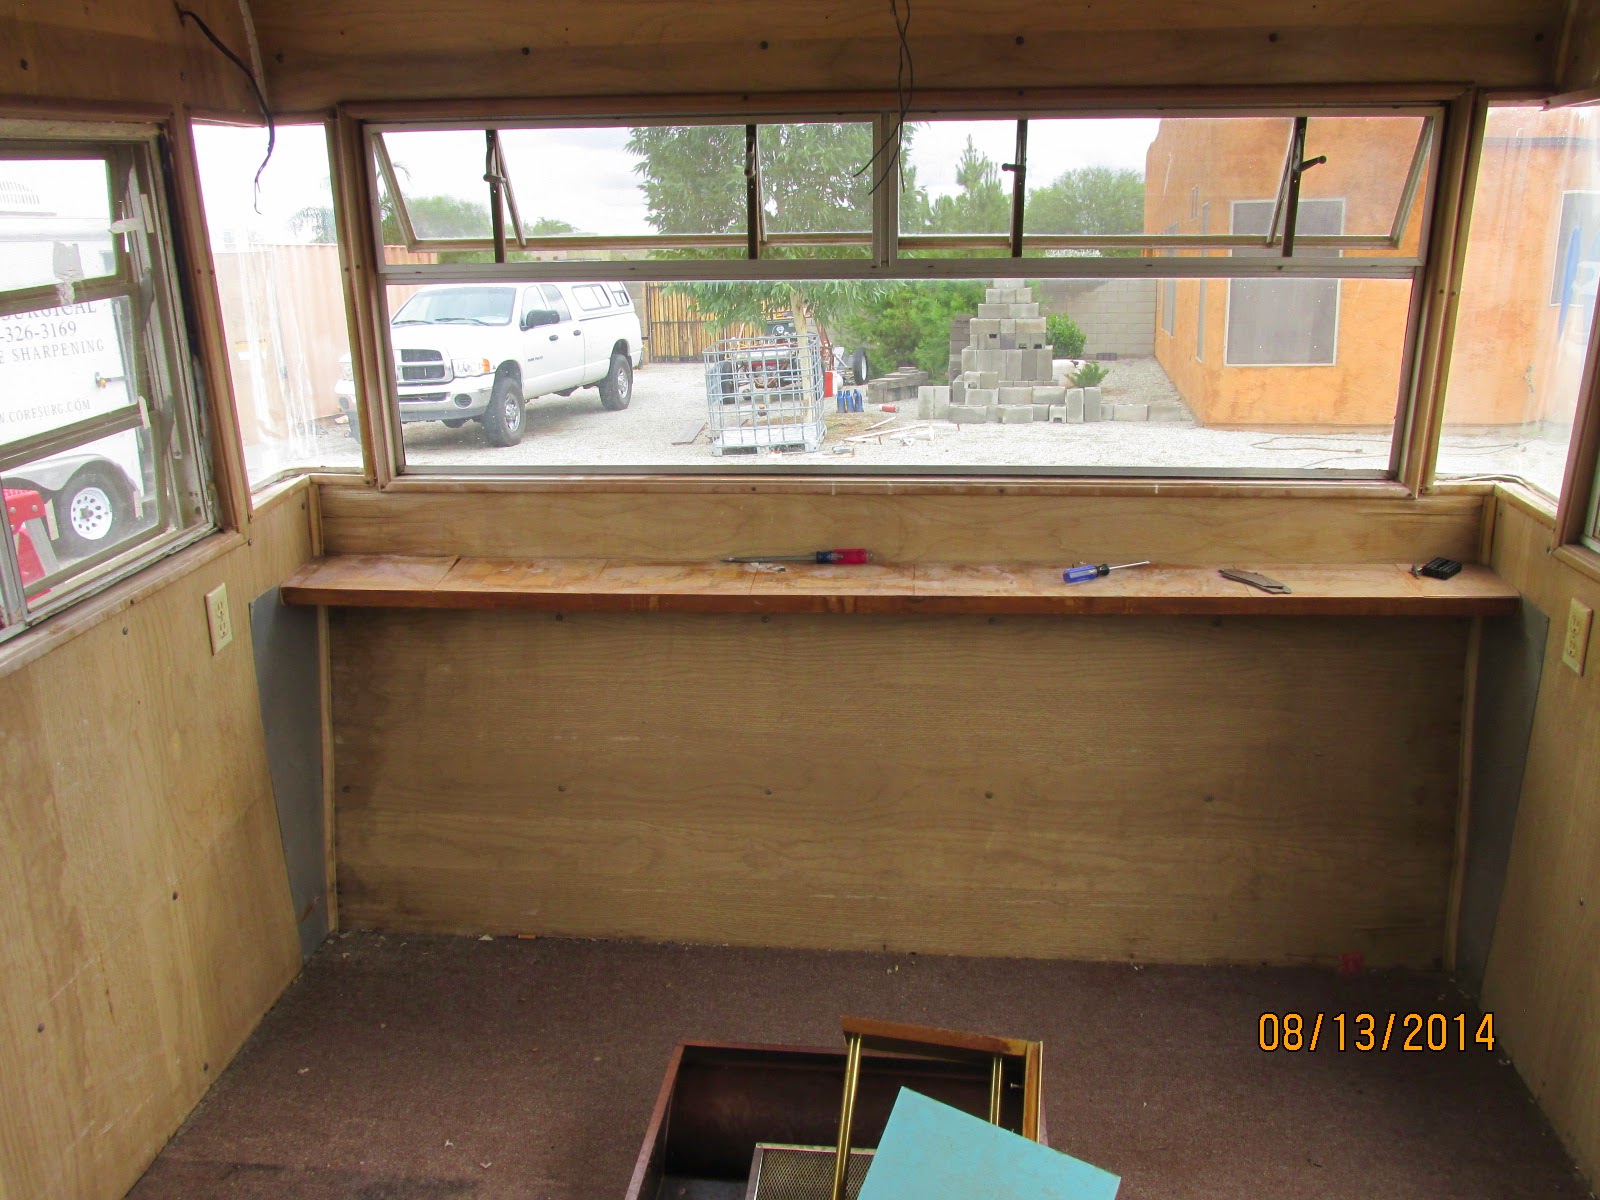
The inside looked like this.


Maybe we should have been a little better informed before jumping into this DIY project. The interior was original, and filthy. Fine. We planned on taking it out anyway. After bringing it home, a rainstorm showed us how much the roof leaked. Most of the woodwork was water damaged.

Luckily, inspiration provides superhuman motivation for our Senior Project Manager, despite uncomfortable heat and all of the setbacks of discovering what this camper actually needs.


By the way, you can find vintage campers that have already had the demolition done and now the owner is sick of the project and ready to sell it... if you want to take it on.

The demolition begins like this.

Ceiling panels
Window coverings
 Mattress and cabinets
Dresser covering rear door
Refrigerator and cabinets
Starting to pile up

And pile up...
\ 

For a true vintage redo, some people opt to restore the interior, but everything was in such bad condition, it would have been nearly impossible. We even checked out the turquoise stove but all of the propane lines and other parts have deteriorated to the point you'd have to rebuild the whole unit.

DH made all this progress in just a week. Removed ceiling, interior fixtures, flooring, and some wall panels.


More water damage in the rear floor under the bathroom area.

Next, he started stripping the roof. Most forums recommend simply adding a new layer of roofing material. This is due to the difficulty of removing old layers. There were at least five layers on this trailer, and they were cracked and brittle. The old vents needed replacement and resealing as well. The roof also has dents where the original ribs are missing or damaged and no longer bow out to help water run off. 

I didn't get a before photo. Here's the bare aluminum after.
The front end is stripped to bare metal.
 The loose rivets along the front need to be redone.
Here's from the outside

Now all the cracks and seems and holes need patches and the roof needs a coating of sealant. First DH plans to build new ribs for supporting the new vents, then install and seal the vents. Here's a little patch on the side of the trailer. It would be difficult to find aluminum siding to match, so we went with diamond plate. 
The damaged insulation will be replaced with new. Here is a view with of the ceiling.

After two trailers full of materials to the dump, our demolition is complete. Be sure to check back as I'll be posting our design ideas and progress. It doesn't look like much yet, but some day...